Here's a product card before and after one prompt.
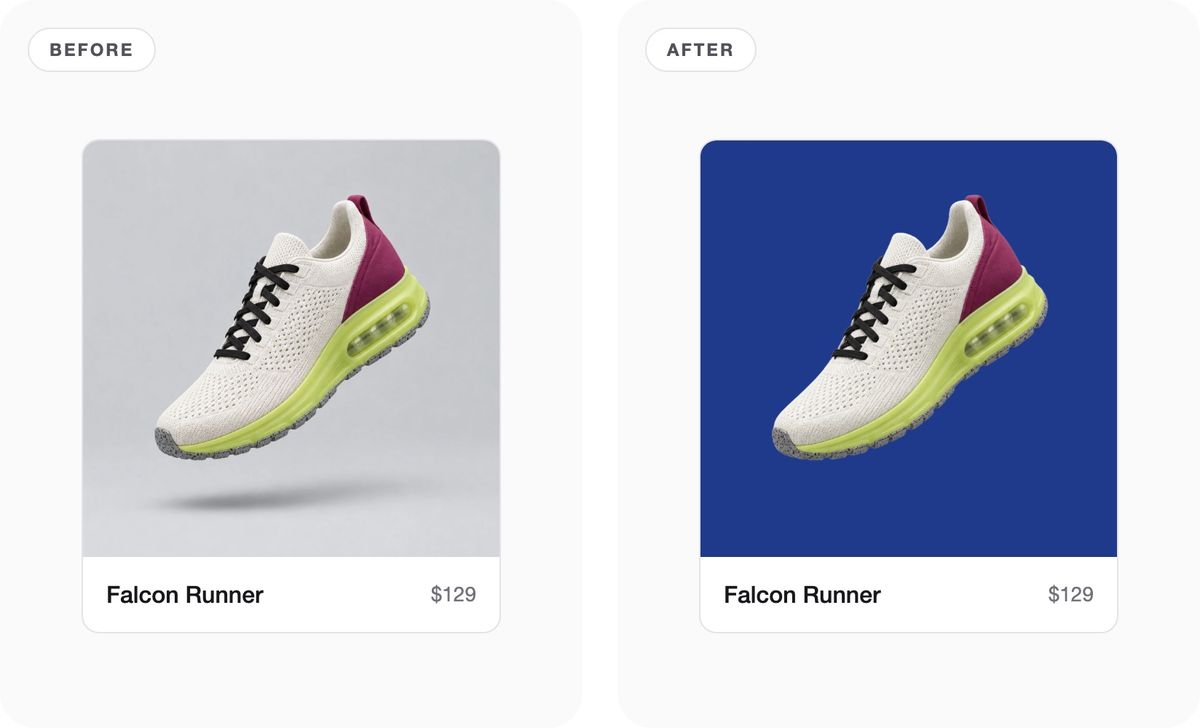
The "after" is a clean, transparent cut-out of the product sitting on the card's brand color, and all we had to do was ask Cursor for it:
Remove the background, resize to 800px wide, PNG format.
https://ik.imagekit.io/your_imagekit_id/product.jpg?tr=e-bgremove:w-800,f-pngCursor called ImageKit's DevTools MCP server, got back a valid transformation and dropped it into the component, and the page hot-reloaded with the new image. In the URL above, your_imagekit_id and product.jpg are placeholders for your own ImageKit ID and image path, so it only loads once you swap those in.
How to use Claude for digital asset management follows one campaign from search to publishing with ImageKit's MCP servers, and in its last step Claude Code uses DevTools to build the delivery URLs for a website. This post picks up that one tool and goes deeper: what DevTools MCP adds when an assistant builds transformation URLs, how to connect it, and five different prompts covering a face crop to a conditional resize.
Why use DevTools MCP for transformation URLs
AI assistants have seen plenty of ImageKit URLs on the web, so they often get the common transformations right without any help. The details that matter for longer chains, such as which values a parameter accepts, the order the steps have to run in and whether the finished URL actually renders, live in ImageKit's docs rather than in a model's memory of the web. DevTools MCP puts them within the assistant's reach: its transformation_builder tool validates each step against the supported parameters and checks the finished URL on the CDN before handing it back in the right order.
How transformation_builder works
DevTools MCP exposes two tools, search_docs and transformation_builder, and this post is about the second one. It takes three inputs:
query: A plain-English description of the transformation you want. Requiredsrc: An ImageKit-hosted URL to transform. Default: a sample imagefetch_url_to_check: Whether to verify the generated URL is accessible via the CDN. Default:true
It returns the finished url, the raw tr_value, a status, and a message. Two behaviors show up in those responses:
- It validates each step. A bad value comes back as a numbered error, like
Step 1: 'focus': Value error, with a pointer to search the docs for supported parameters. - It checks the result on the CDN. With the CDN check on, AI transformations that are still rendering come back with "Transformation taking time! It may still be processing!"
That is why the tool is worth connecting even when the assistant already knows the common chains: an invalid value comes back as an error the assistant can read and act on. The tool builds from your words, so wording still matters, and the tips at the end of the post cover how to phrase a query well.
Connect DevTools MCP
DevTools is public and needs no sign-in, so connecting it takes a minute.
- Claude: open Customize, go to Connectors, search for imagekit, and click Connect on ImageKit DevTools. The Claude guide has screenshots of each step.
- Cursor: add the server to
~/.cursor/mcp.json:
{
  "mcpServers": {
    "imagekit_devtools": { "url": "https://devtools-mcp.imagekit.io/mcp" }
  }
}
For any other client, see Get started in minutes in the MCP servers post. To follow the Cursor example at the end, you'll also need a Next.js app that uses @imagekit/next.
Optionally, add ImageKit's agent skills, which pair with the server:
npx skills add imagekit-developer/skills --allThe transformation-builder skill ships a parameter reference, query-writing guidance, and ordering rules for multi-step chains.
Five prompts
Run them in Claude, where you can click each URL the tool returns and see the result.
Each prompt below shows the tr_value the tool returned and the image it produced for us. The full URL has the same shape as the one at the top of the post: your image URL, then ?tr= and that value.
1. Crop to a face
Resize to 800x600, crop with focus on the face.
w-800,h-600,fo-face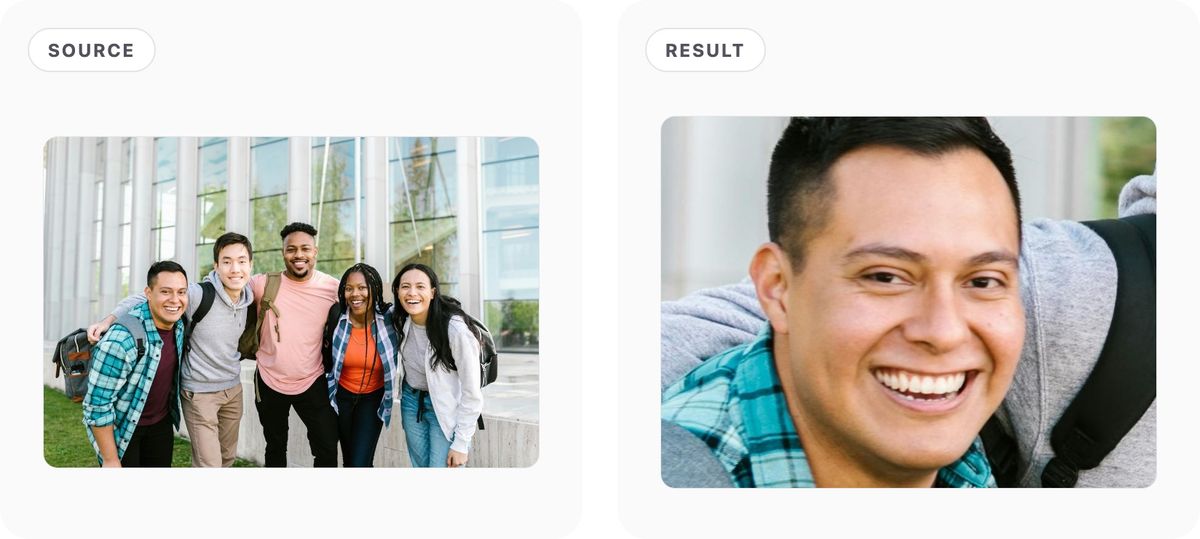
The result is an 800x600 crop centered on a face. It's nothing fancy, but notice that the tool picked fo-face rather than a center crop: the same size without it keeps the whole group and trims the sides.
2. Add a text badge
Resize to 800px wide first, then add a text overlay NEW ARRIVAL, white text on a dark background, bottom left.
w-800:l-text,i-NEW%20ARRIVAL,fs-45,pa-10,bg-222222,co-FFFFFF,lxc-0,lyc-0,lap-bottom_left,l-end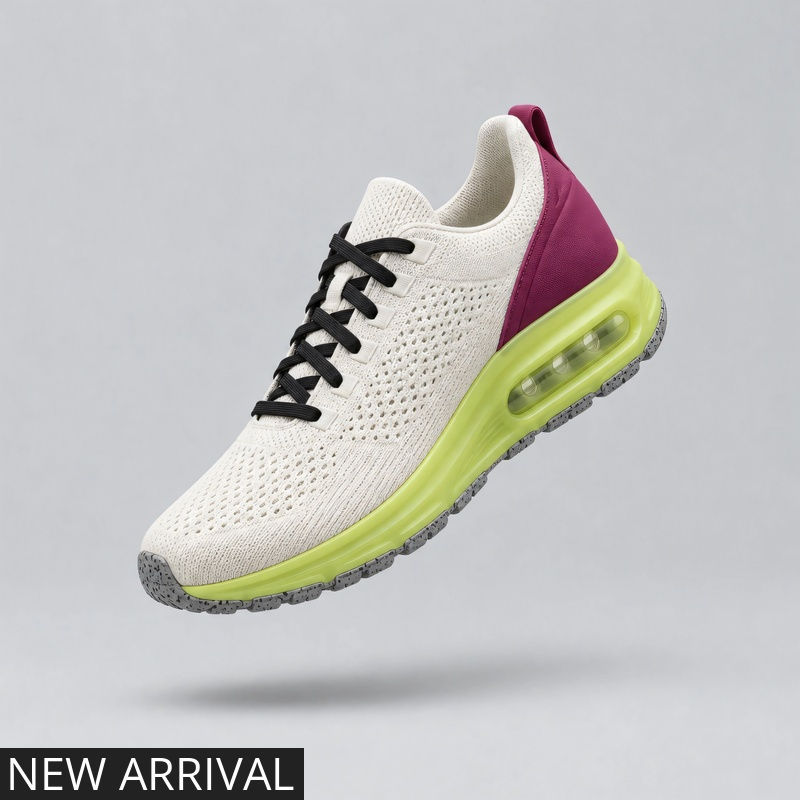
Notice the "resize first" in the prompt, which is what keeps the badge readable in the result. Overlays are drawn at the resolution of the image they sit on, so without it the badge is drawn on the 5600x5600 original and shrinks to a speck at display size.
A text overlay opens with l-text and closes with l-end, and the text goes in i-, which is a lot to remember when the tool can write it for you.
What the assistant did to get there
It helps to see what happened between the prompt and that line, because this is where the MCP server earns its place. In our run the assistant made a single call to transformation_builder, passing the request along as the query in the same words we had typed, together with the image to work on as src:
{
  "query": "Resize to 800px wide first, then add a text overlay NEW ARRIVAL, white text on a dark background, bottom left.",
  "src": "https://ik.imagekit.io/your_imagekit_id/product.jpg"
}
The tool answered with the finished URL, the raw tr_value and a status, which is everything the assistant needs to hand the result back to you:
{
  "url": "https://ik.imagekit.io/your_imagekit_id/product.jpg?tr=w-800:l-text,i-NEW%20ARRIVAL,fs-45,pa-10,bg-222222,co-FFFFFF,lxc-0,lyc-0,lap-bottom_left,l-end",
  "status": "done",
  "message": "Transformation URL is ready.",
  "tr_value": "w-800:l-text,i-NEW%20ARRIVAL,fs-45,pa-10,bg-222222,co-FFFFFF,lxc-0,lyc-0,lap-bottom_left,l-end"
}
The assistant didn't have to recall how a text layer opens and closes, which value puts the badge in the bottom-left corner or how a space is written inside a URL. The tool worked all of that out and checked the finished URL on the CDN before returning it. Every prompt in this section went through the same call, so the rest of them show only the tr_value that came back.
3. Add your logo as a watermark
Resize to 800px wide first, then add the image logos/falcon-logo.png as an overlay, 180px wide, positioned with x -24 and y -24 so it sits 24px in from the right edge and 24px up from the bottom edge.
w-800:l-image,i-logos@@falcon-logo.png,lx-bw_sub_180_sub_24,ly-bh_sub_ch_sub_24,w-180,l-end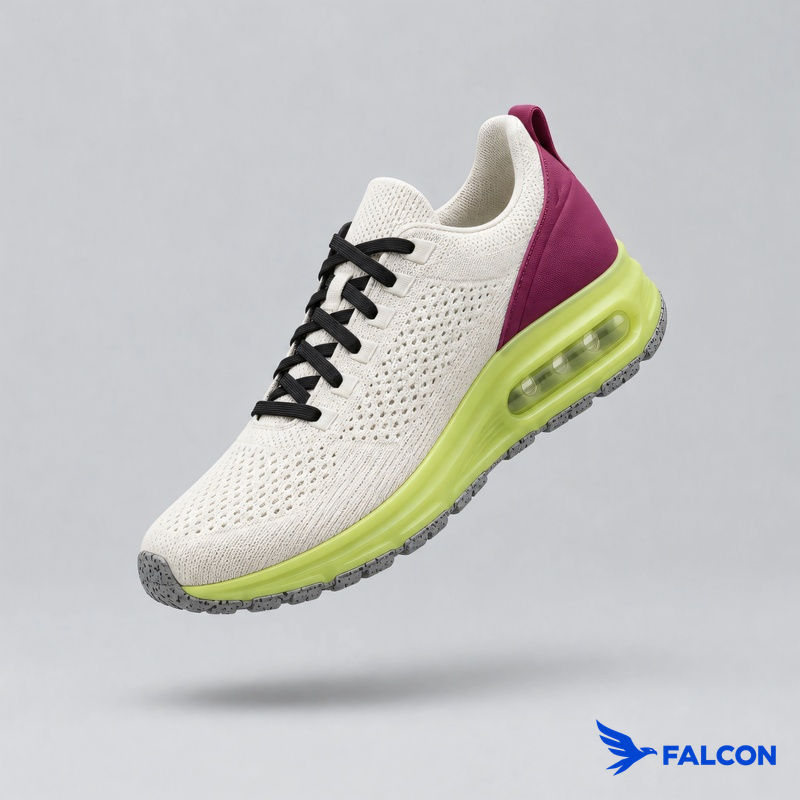
This is the image version of the badge from the last prompt. An image overlay opens with l-image where the text one opened with l-text, and it points at a second file in your media library, with the slashes in its path written as @@. The tool also resized the logo to 180px inside the layer, so the logo and the photo are each sized on their own. To leave a margin, it wrote the position as arithmetic: lx-bw_sub_180_sub_24 reads as the base image's width, minus the logo's 180px, minus 24, and ly-bh_sub_ch_sub_24 does the same from the bottom using the logo's own height, so the margin holds whatever size the photo is.
4. Extend a product shot into a banner
Resize to 400px tall first, then pad to a 1200x400 banner with generative fill background.
h-400:w-1200,h-400,cm-pad_resize,bg-genfill
Generative fill isn't a transformation of its own but a background mode on a padded canvas: cm-pad_resize fits the whole image inside the 1200x400 frame without cropping, and bg-genfill paints the empty space on either side of the result. You can also give it a text prompt to steer what it paints.
"Resize first" matters less here than it did for the badge: without it, the banner looked the same.
Generative fill is an AI transformation, and those can take a moment on the first request, so the tool may report the result as still processing. Fetching the URL again returns the finished image.
5. Resize only when the image is too wide
If width > 1000, resize to 1000, else leave it.
if-w_gt_1000,w-1000,if-endOn our 5600px-wide product shot, the result is a 1000x1000 image. Conditional transformations let one URL handle images of different sizes: you describe the condition in plain English and the tool builds the if block.
All five prompts spell out sizes, steps, and order, and the tips in the next section explain why that helps.
Tips for writing queries
The tool builds from your words, so the more specific the query, the closer the result is to what you had in mind. We sent four casual prompts to the tool word for word, against the same images, and the table below shows what came back next to a query that worked:
| You say | What came back | Query that worked |
|---|---|---|
| "Put it on white" | A solid white image, product gone | "Remove the background, then pad with a white background" |
| "Crop around the face" | fo-face with no size, so no crop at all | "Resize to 800x600, crop with focus on the face." |
| "Make it wider without stretching" | A plain enlargement, w-iw_mul_2 on one run and w-iw_mul_1.5 on another: the same shape, only bigger | "Resize to 400px tall first, then pad to a 1200x400 banner with generative fill background." |
| "It's blurry, fix it" | No transformation at all | "Resize to 1000px wide first, then apply AI retouch, then AI upscale" |
The order in the last row is deliberate: AI upscale and retouch only accept inputs under 16 MP, so on a large original like our 5600x5600 product shot the query resizes first and retouches before it upscales.
When a query asks for a value ImageKit doesn't support, the tool returns a failed status and no URL. Asking it to "crop to a square around the product", for example, returned this message:
Validation errors in transformation parameters: Step 1: 'focus':
Value error, Invalid focus: 'product'. Must be a position keyword,
'auto', 'face', 'custom', or a COCO class name. (got 'product')
Try again with other query parameters or values. If the issue
persists, transformations may be outdated. Search the docs for
supported transformations and parameters.
The message names the step, the parameter, and the value that's wrong, and it lists what's valid: "product" isn't a focus target ImageKit knows, while "face" and the COCO object classes are. That gives the assistant enough to call the tool again with a corrected query.
Finally, open the URL before you use it, because a transformation can be valid and still not be the picture you had in mind.
The same tool does two different jobs, depending on the client you call it from, and the next two sections take them one at a time.
Get an image URL without writing code
If you work in marketing or content, you usually know exactly which image you need, and the part that tends to need a developer is writing the transformation URL for it. With DevTools connected to Claude you can describe the image in your own words, open the URL that comes back to check that it's the picture you wanted, and then paste it wherever it's needed. There's no code to write and no sign-in to set up, and every prompt in the section above works this way.
Put the transformation in your code with Cursor
When the image belongs in a component rather than in a link, ask for the transformation in the format your code uses. In Cursor or Claude Code, that means asking for the @imagekit/next format instead of a raw URL string:
Using ImageKit, update ProductCard so the image has its background removed, is resized to 800px wide, and is in PNG format so the background stays transparent. Use the @imagekit/next transformation array, not a raw tr string.
<Image
  src={src}
  alt={name}
  width={800}
  height={800}
  responsive={false}
  transformation={[{ aiRemoveBackground: true }, { width: 800, format: "png" }]}
  className="h-auto w-full"
/>
This is the transformation from the top of the post, with each object in the array standing for one chained step, the same as the : separators in the URL. Your code stays readable, and the next person can tweak the width without decoding a URL.
The component applies the same transformation as the URL at the top of the post, so the card you saw at the start is the card you just built. The URL text can differ slightly between runs, with the PNG step chained as ,f-png in one and :f-png in another, but every variant served the same image.
One prop in that component didn't come from the tool. responsive={false} was already on the card before we asked Cursor for anything, and we set it ourselves, because by default @imagekit/next appends its own responsive width step to the URL.
What we built
- Connected DevTools MCP, no sign-in needed
- Built five transformations, from a face crop to a conditional, with plain-English prompts
- Learned how to phrase a query so the tool builds the image we meant
- Dropped a background removal chain into a Next.js component
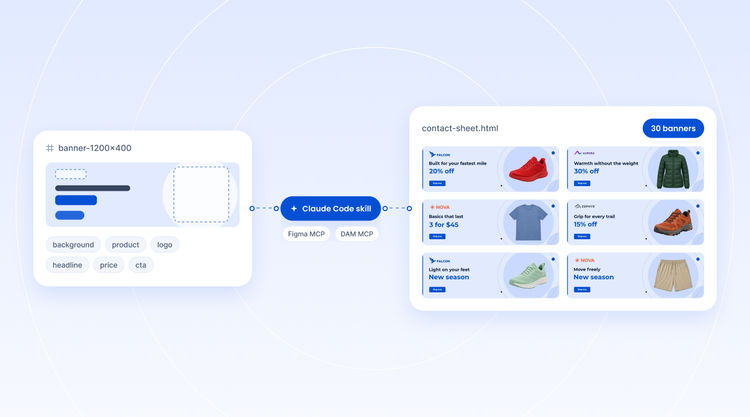
One URL is a good start, and in the next post we'll build 30 of them at once, from a Figma frame and the assets in your DAM.
Get started
DevTools MCP is public, so you can connect it and run these prompts today. The Build with AI guide covers setup for every client. To run them on your own images, sign up for a free ImageKit account.